Proxmox is one of the most popular virtualization platforms. It works great both in companies and in home homelabs. With it, you can run virtual machines and containers, and manage everything from your web browser.
If you’re wondering how to get started with Proxmox, this guide will walk you through the entire process - from installation, through initial setup, all the way to launching your first virtual machine.
This article is aimed at beginners, so you’ll manage even if you have zero experience with the topic.
What is Proxmox and what is it for?
First, let’s answer a more basic question: what exactly is virtualization?
In the context of this article, it means creating software (virtual) versions of hardware resources such as computers, servers, disks, or networks. In other words, instead of using several physical computers — each with its own processor, memory, disks, and operating system - we take one physical machine and run several virtual computers on it. Each of those virtual machines can have a different operating system, hardware specs, disks, and so on. It’s the physical host (called a hypervisor) simulating other hosts. The operating systems and programs running inside the virtual machine behave exactly as they would on real hardware. The system may not even realize it’s not running on a “real” machine. This lets us make much better use of physical hardware, run multiple different OSes at the same time, and scale our environment easily.
A hypervisor can be Type 1 or Type 2. Type 1 is bare-metal - virtualization runs directly on the physical hardware. Proxmox belongs to this category. Other examples include VMware ESXi, Hyper-V, and XenServer.
Type 2 hypervisors are simply applications running on a regular operating system (for example Windows). Examples are Oracle VirtualBox and VMware Workstation. This approach is much easier for the user - you just download and install the program. However, it has significant drawbacks, mainly lower performance and stability, plus far fewer advanced features. Still, it’s a great choice for many use cases. I use VirtualBox myself on my laptop for quick testing of systems and software.
But if your needs are more serious and you want a professional virtualization environment, you’re only interested in Type 1. One of the best representatives is Proxmox. Unlike the world’s most popular solution - VMware - it’s completely free and open-source. That means you can use it commercially without paying any license fees. Thanks to VMware’s aggressive pricing policy in recent years, Proxmox has gained a lot of popularity. Previously associated mainly with homelabs and smaller companies, in 2026 it has become a full-fledged competitor to VMware.
Proxmox is based on Linux, specifically Debian. The first version was released in 2008. The system is almost 20 years old, so it’s fair to call it mature. It offers many advanced features such as clustering (multiple hosts working as one ecosystem), snapshots (saving the state of a virtual machine), and high availability (when one host fails, virtual machines automatically start on another).
Why choose Proxmox specifically?
We already know that Proxmox is a powerful hypervisor for running virtual machines. But why did I settle on Proxmox?
- It’s free. You can pay for vendor support if you want, but it’s not required.
- It has an excellent web interface - you manage everything from your browser.
- It lets you run both virtual machines and containers (more on that later).
- Setting up backups is very straightforward.
- It supports many advanced features.
- It’s popular and has a huge community, so most problems are easy to solve.
There’s one more big advantage: enormous flexibility in deployment. There’s basically no other virtualization system that you can run without issues on an old PC on one hand, and on a large-scale enterprise infrastructure on the other. You’re not limited by your hardware (like with VMware), licenses (like Hyper-V), or complex architecture (like oVirt). You can start with a single host on a regular computer and grow to a multi-node cluster on powerful servers. That’s why it’s a great and cost-effective platform for learning and probably the best choice for a homelab.
Proxmox hardware requirements
According to the official documentation: link to current Proxmox requirements, for a test installation the following is enough:
- Processor: any 64-bit CPU with Intel VT / AMD-V support
- RAM: minimum 1 GB
- Hard drive and network card
In short - Proxmox will run on almost anything. That’s one of its biggest strengths. Of course, a machine with such low specs won’t do much, but let’s be honest: any computer today, even a 10-year-old one, will have much better specs.
Now let’s look at the recommended requirements:
- Processor: any 64-bit CPU with Intel VT / AMD-V support
- RAM: minimum 2 GB for the OS and Proxmox services + memory planned for virtual machines + if you’re using ZFS or Ceph (more on that later), add 1 GB for every 1 TB of disk space.
- Disks for the OS: hardware RAID or no RAID if using ZFS.
- Disk space for virtual machines: hardware RAID for local storage, no RAID for ZFS or Ceph. Network storage is also supported.
- Redundant 1 Gb network cards, additional cards — including 10 Gb+ depending on your setup.
A quick comment: for serious, professional installations these requirements should be met. If you’re just starting and building something like your first homelab, in my opinion the most important things are:
- RAM - the more the better. You’ll be able to run more machines. I’d say 8 GB is a reasonable minimum. It doesn’t have to be fast gaming DDR5. Anything works, even DDR3. With 8 GB you can easily run 2–4 lightweight Linux VMs.
- Processor - more cores/threads are better. This matters more than clock speed - Proxmox will make good use of them. In my homelab one host has 4 threads (an old i5 7th gen), another has 6, and another has 8. Simply put, more threads mean more independent operations at the same time.
- Disks - it depends on how important your data is. For a homelab there aren’t many strict requirements. Keep in mind that HDDs will be slower (though it often doesn’t matter much for testing). With SSDs, I’d avoid the cheapest models - some have faulty controllers that fail quickly, especially with ZFS (a special file system with many advantages but also certain requirements). If you have two similar-sized disks and enough RAM, you can set up ZFS mirroring (equivalent of RAID1). This gives you protection against single-disk failure and better read performance. You can also use small local disks only for the OS and attach storage for VMs over the network from a NAS (Synology, QNAP, TrueNAS, etc.).
- Network cards - at the beginning, especially with a single host and local storage, it doesn’t matter much. In more advanced setups it’s worth having several network cards (for different purposes - VM network, storage, cluster, management). If you plan to use a NAS for storage, investing in 2.5 Gb cards is a good idea (assuming your NAS, switch, and other equipment support that speed).
Installing Proxmox step by step
Preparing the installation media
Proxmox comes as an ISO file. You can download it here. At the time of writing (2026) the latest version is 9.1. After downloading, you need to boot from it. You have two options: burn it to a DVD or write it to a USB drive. I’ll skip DVDs (does anyone still use them?). For USB, simply copying the ISO file isn’t enough — you need to make the drive bootable. On Windows the easiest tools are Rufus or Balena Etcher. Just select the ISO and start flashing. Once it’s done, move to the computer that will become your Proxmox host.
Booting the installer
Secure Boot must be disabled in the BIOS. How you enter the BIOS depends on your hardware — usually DEL, F2, or Enter.
To start the Proxmox installer, boot the computer with the USB drive inserted. Depending on your hardware, you may need to enter the boot menu (often F12), or - especially on older machines with Legacy Boot - change the boot order in the BIOS so the USB drive is first. Eventually you should see the installer screen:
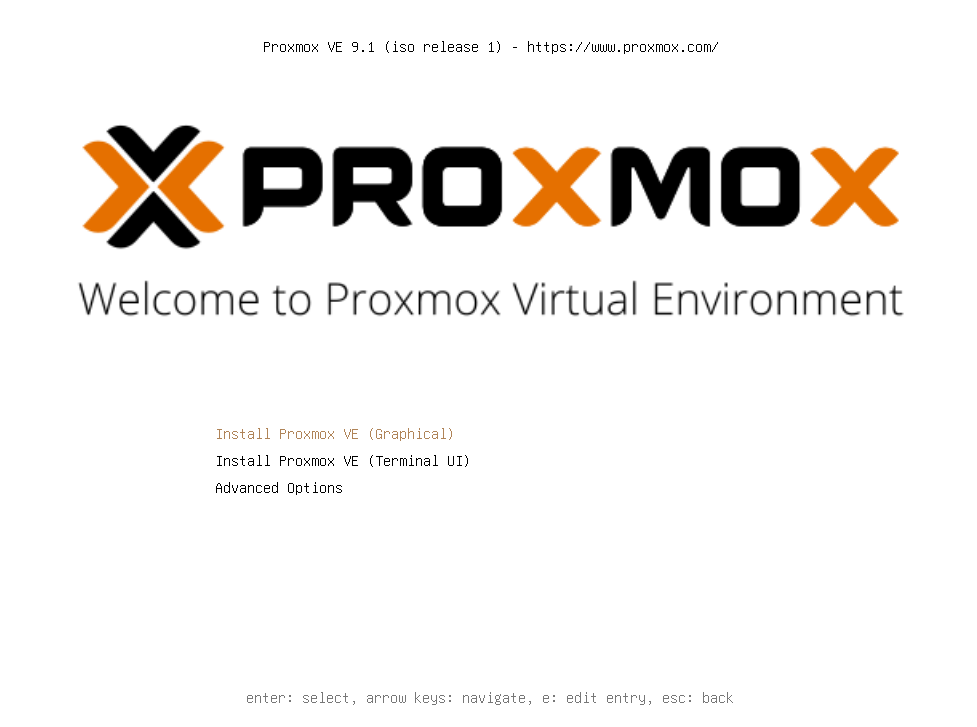
Choose the first option (Graphical installer - the most user-friendly). The installation wizard will start. First accept the license, then select the target disk:
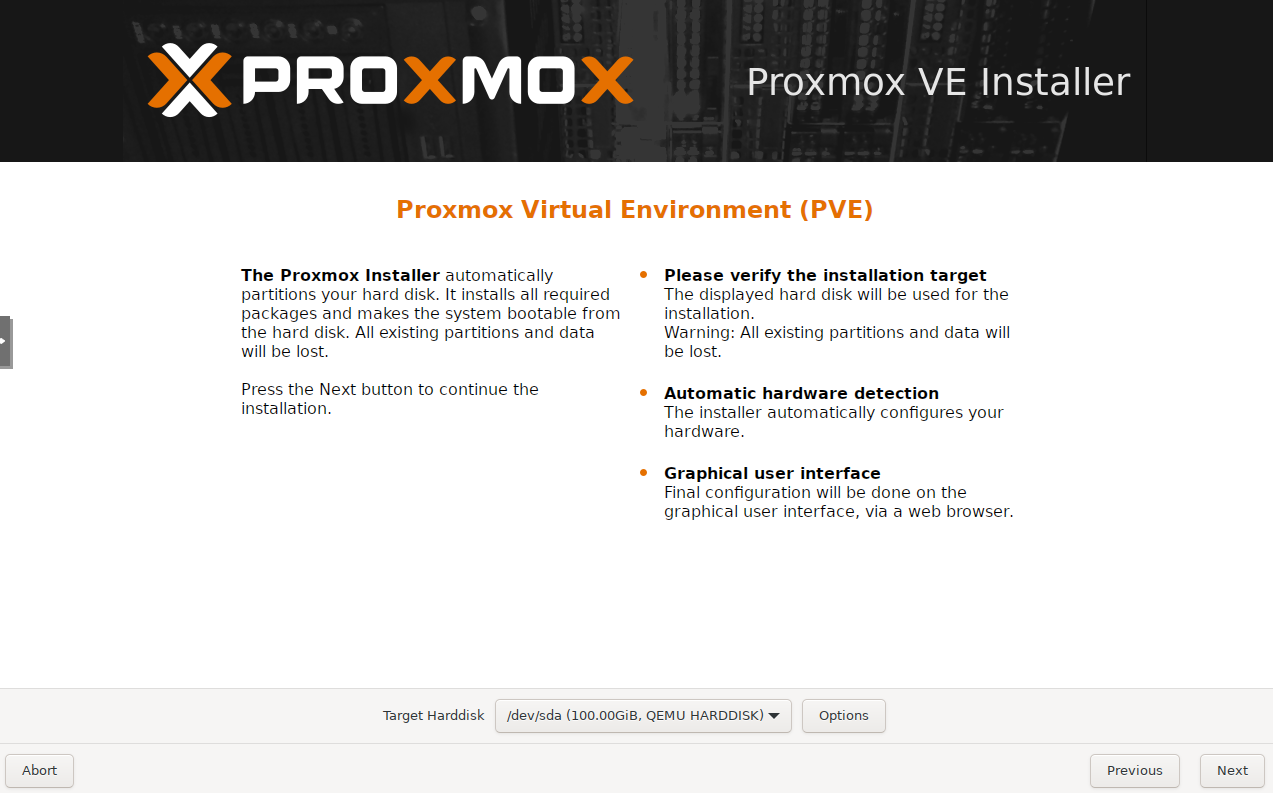
In “Target harddisk” choose the drive where the system will be installed. In my case there’s only one disk, so I leave it as is (ext4 filesystem). If you have two disks, you can use ZFS RAID1 (click Options and select the appropriate settings). Next you choose the time zone and keyboard layout:
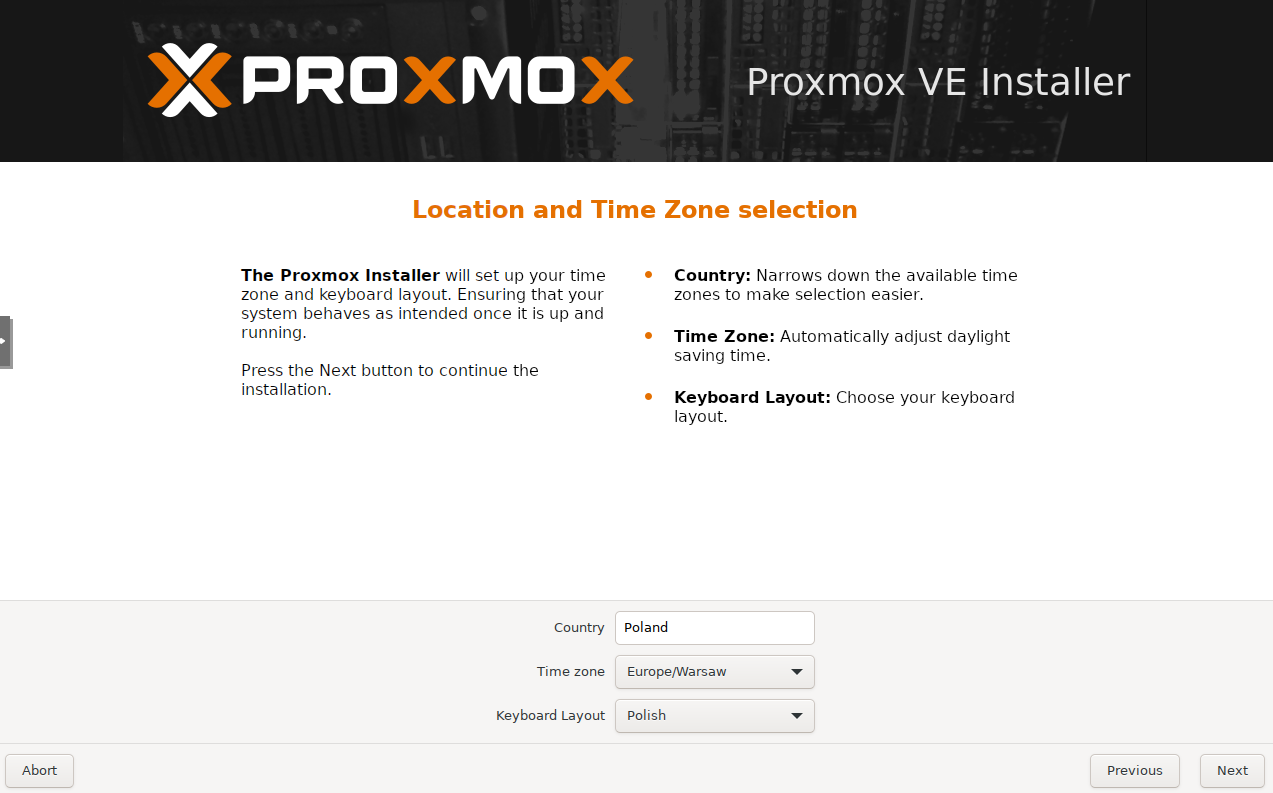
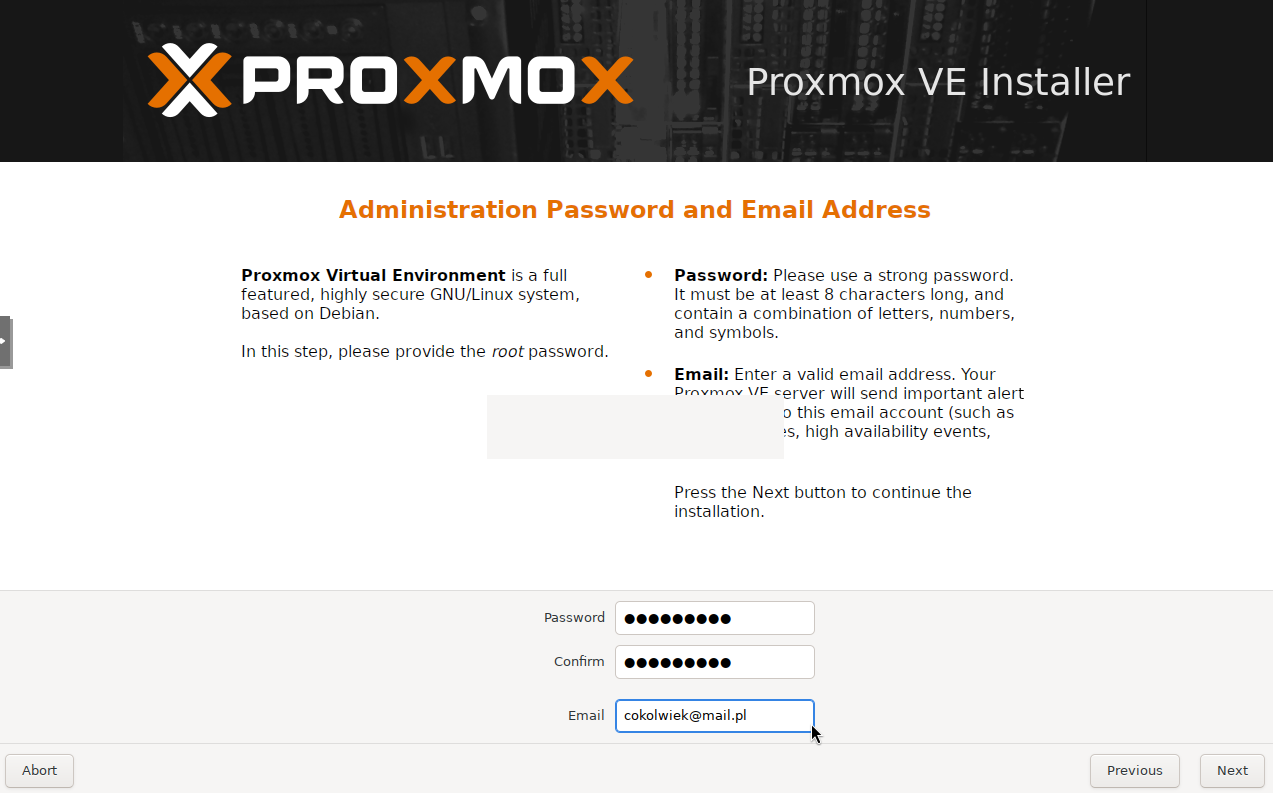
Then enter the admin password and optionally an email address (you can set it later too).
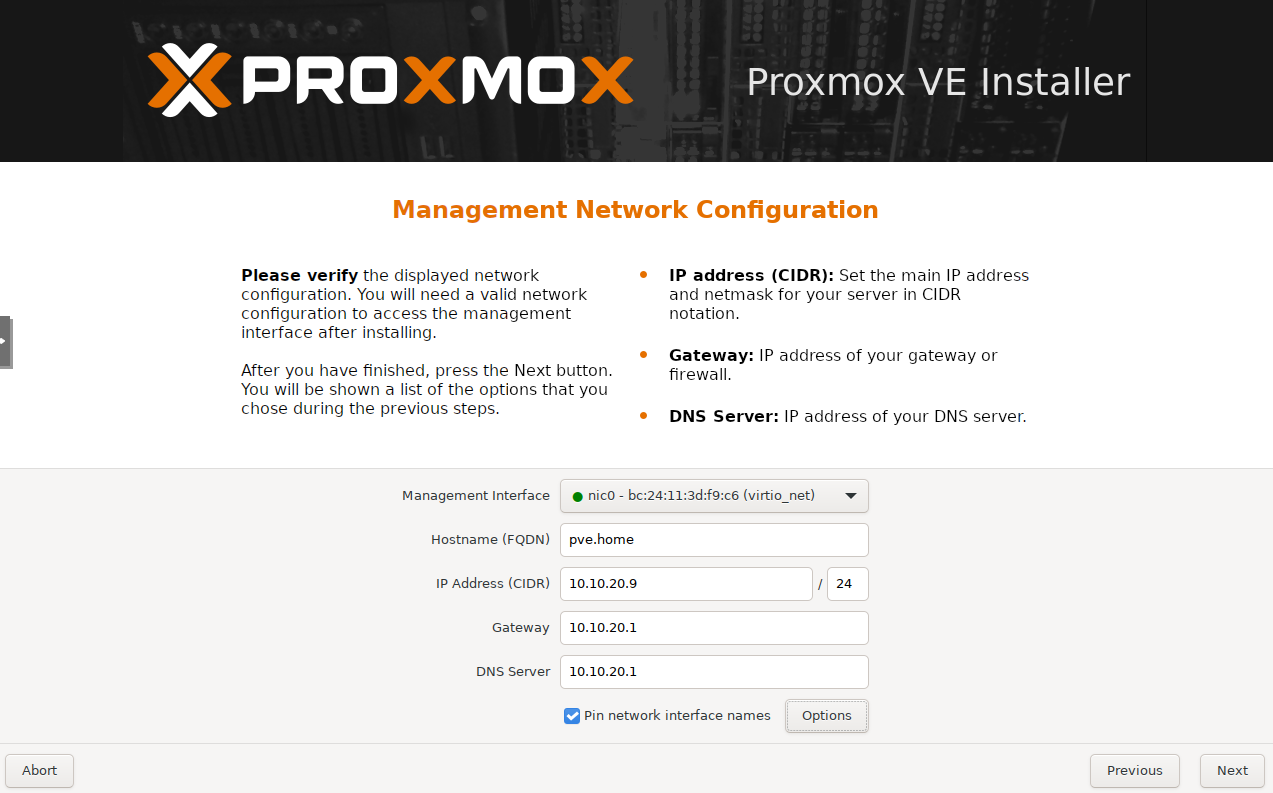
The next screen is network configuration. On a regular home network you should get settings via DHCP. Write down the IP address — that’s what you’ll use later to connect via browser.
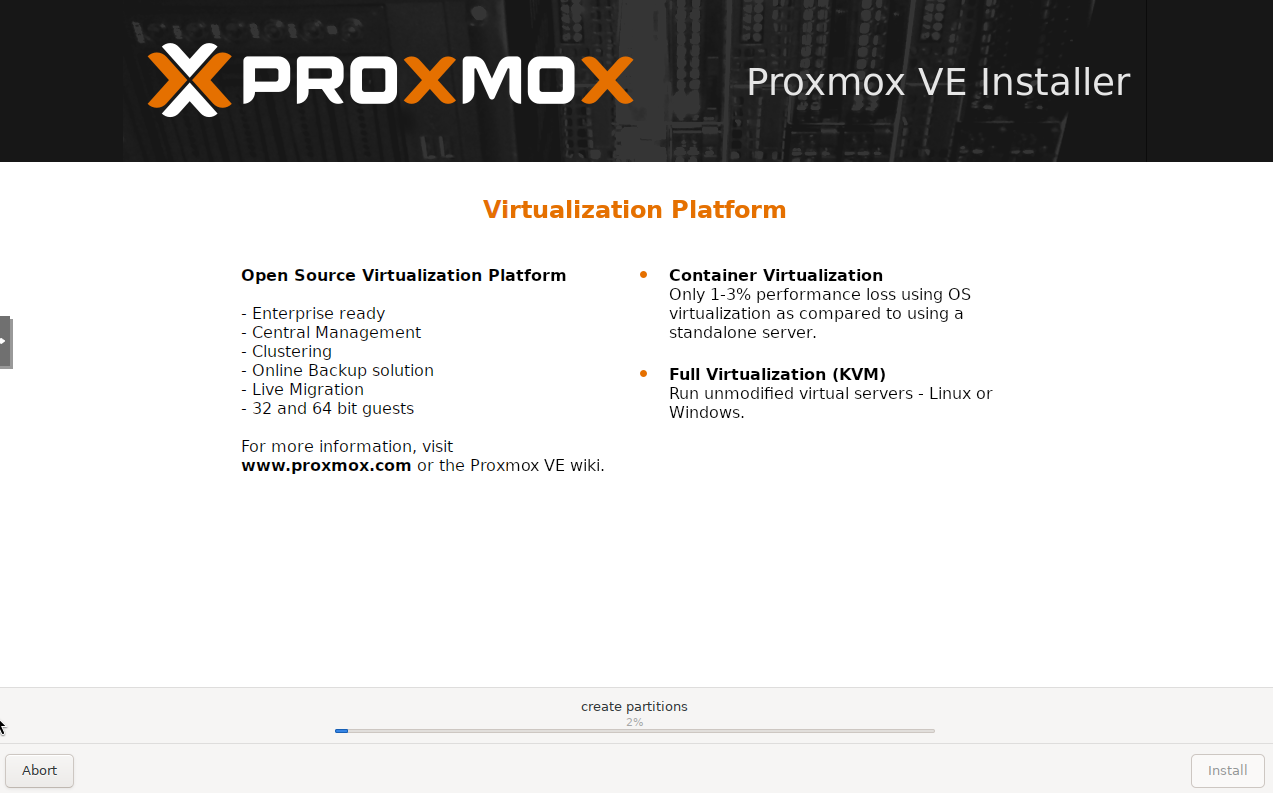
You’ll then see a summary of your choices, and the actual installation will begin.
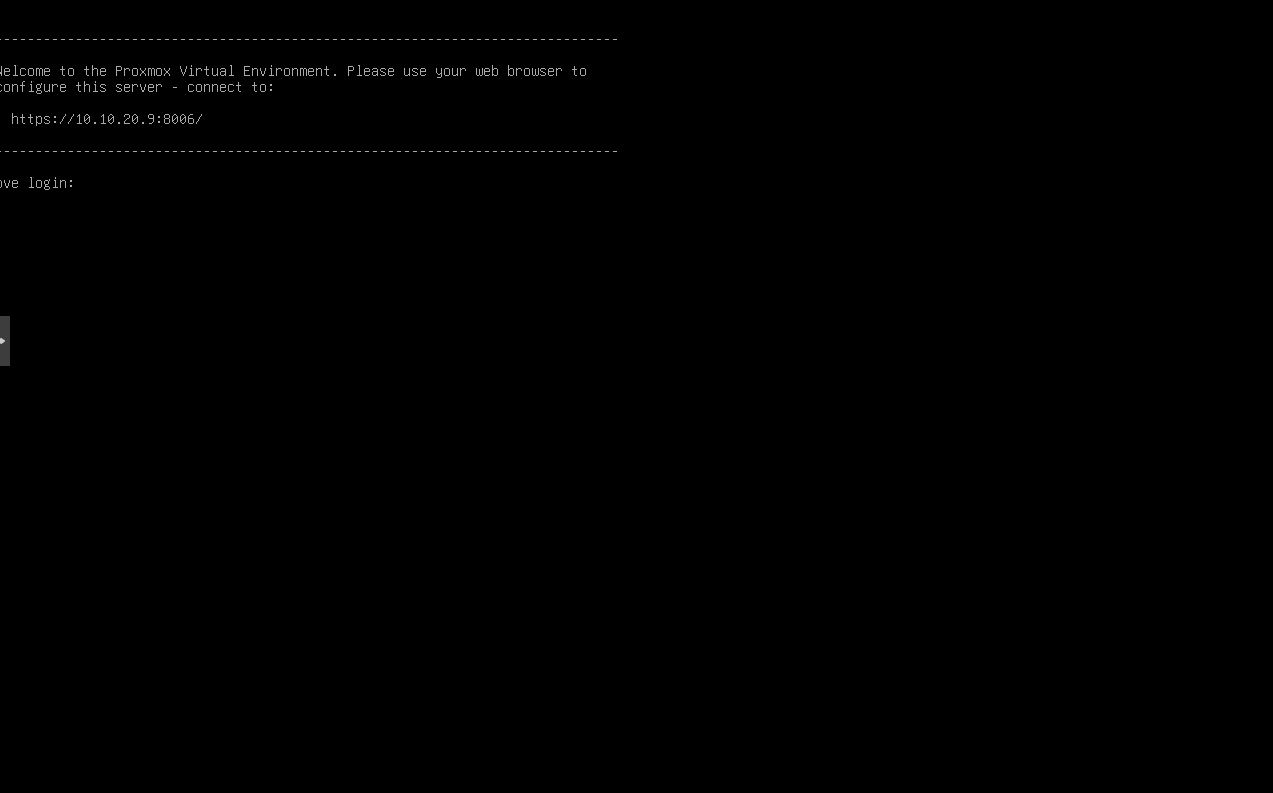
After successful installation the computer will reboot and you’ll see the terminal login screen along with the address of the web interface.
First login and the Proxmox interface
Open your browser and go to the host’s IP address with port 8006. You’ll see a browser security warning:
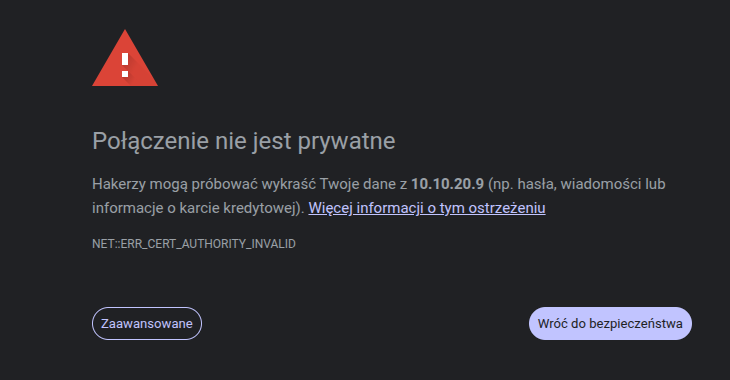
Don’t worry - this is normal. It just means the certificate isn’t known to the browser. We know it’s our internal Proxmox certificate, so click “Advanced” and “Proceed to…”.
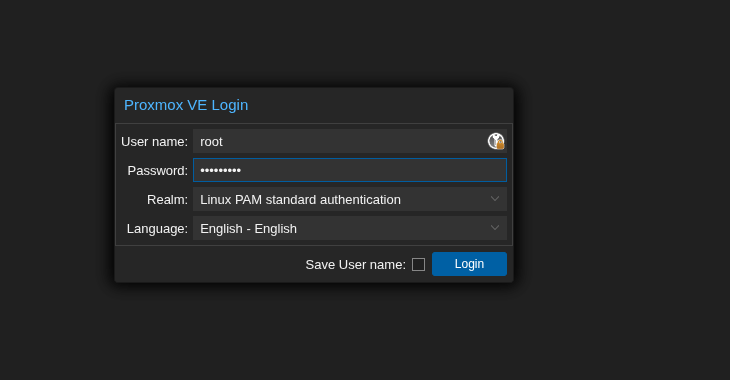
In the login window enter username root and the password you set during installation.
You’ll get a “no valid subscription” message. No problem - you don’t need a subscription. It just means you’re using the free repositories without paid support. Click OK. Now you’re looking at the Proxmox web interface.
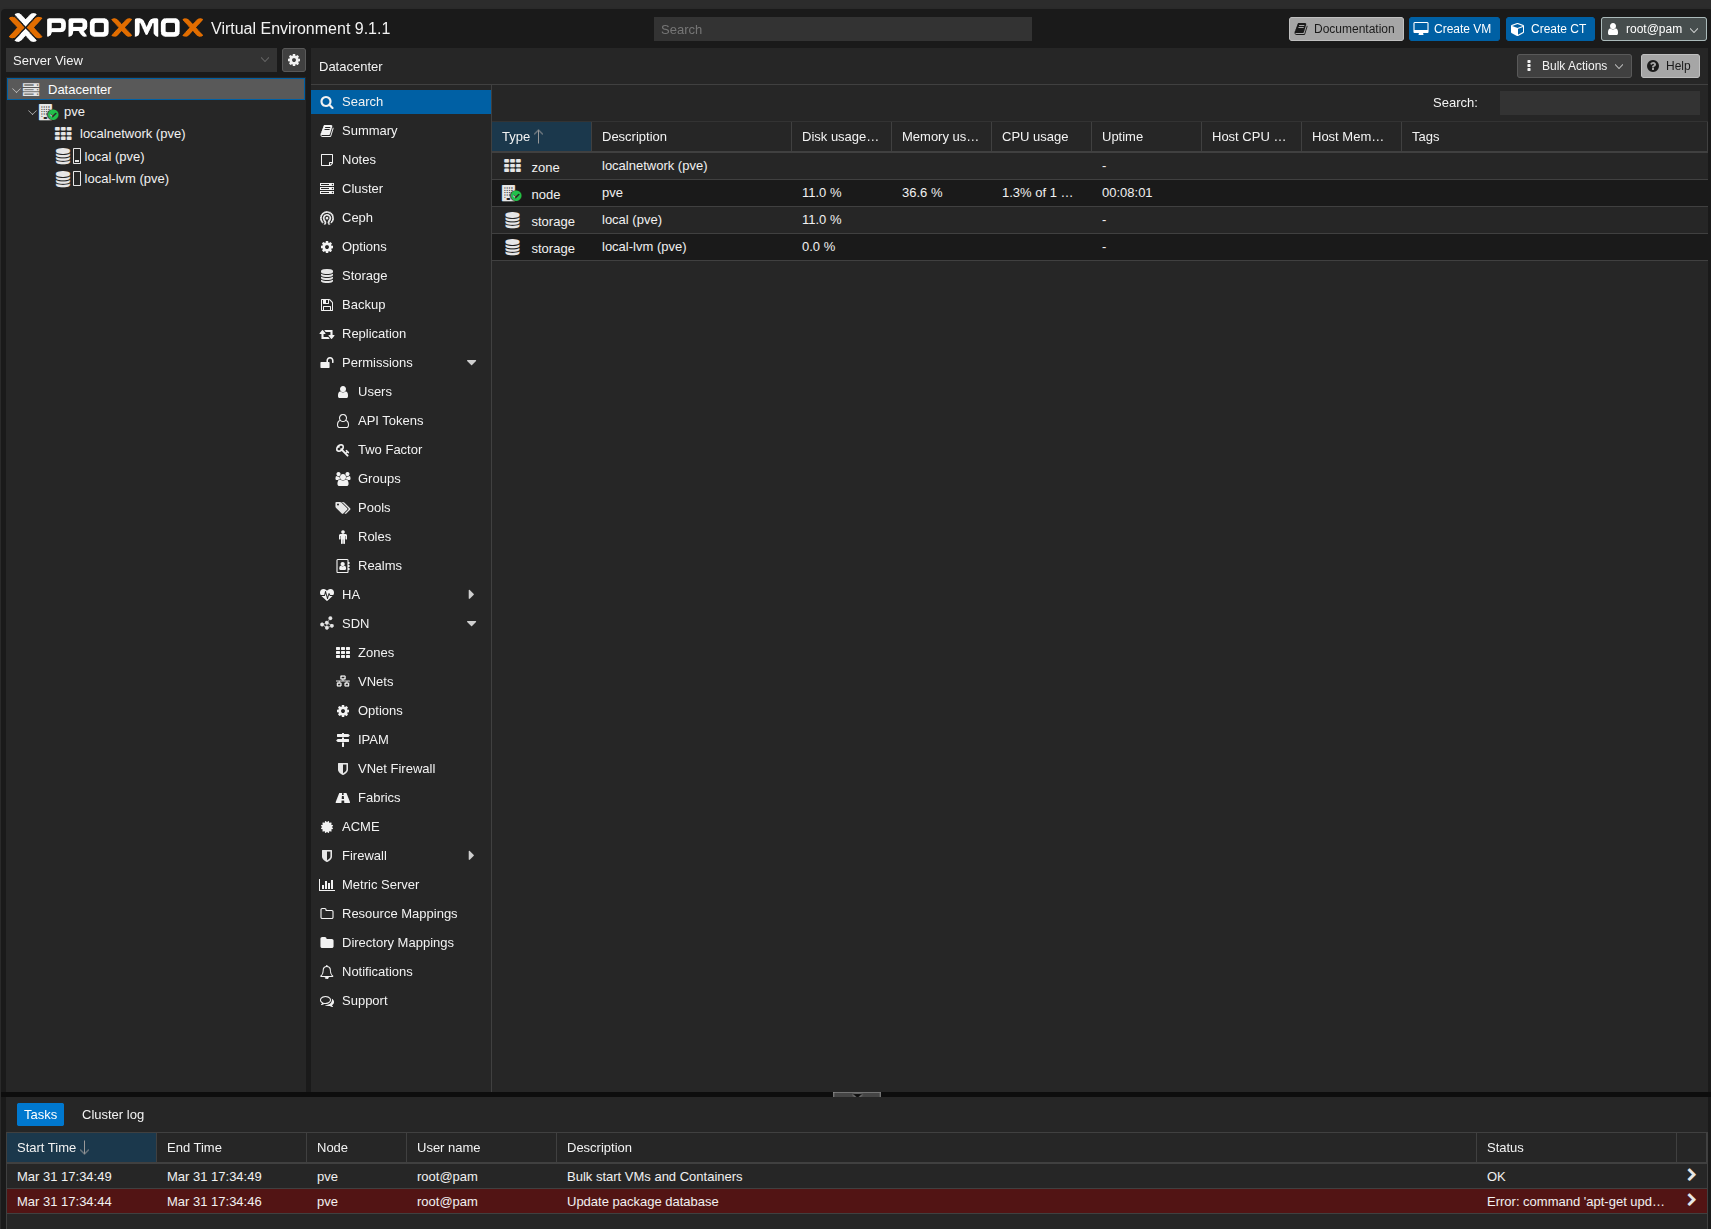
On the left you have your “Datacenter”, which currently consists of one host (in my case “pve”). Below that is the network (not important yet) and the default storage. The “local” storage holds backups and ISO images. “local-lvm” is where virtual machine disks are placed. At the bottom there’s a task bar showing ongoing operations and their status.
The first thing I recommend is configuring the repositories. Go to your node (“pve”), then Updates → Repositories. Click Add, choose “No-subscription” and add it.
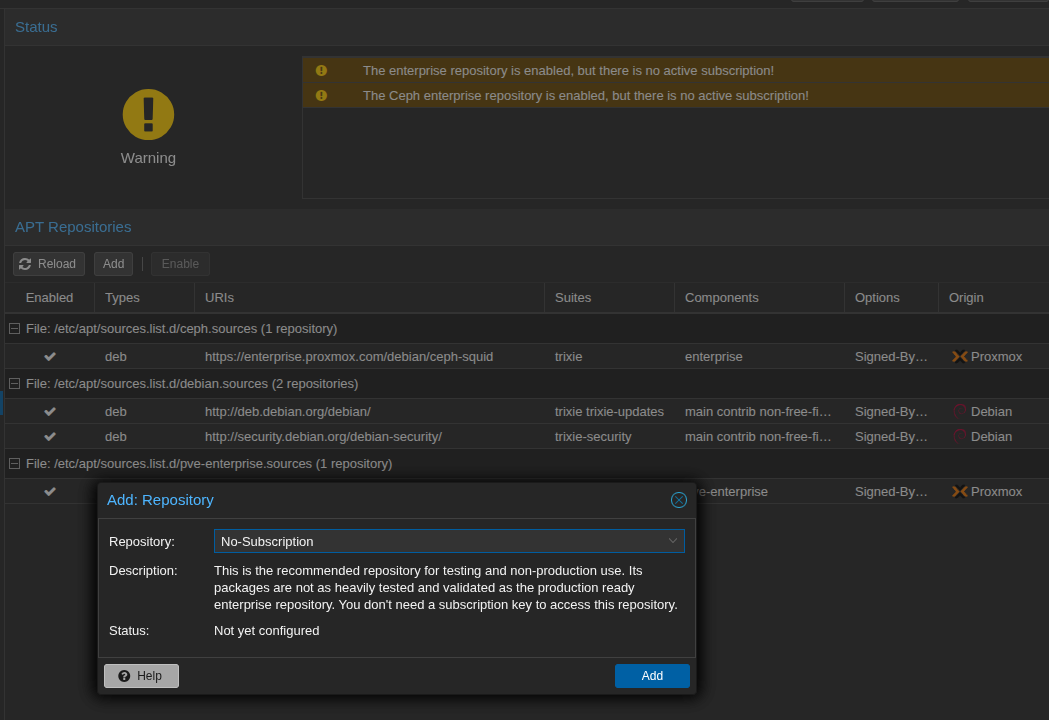
Then disable the enterprise repository (enterprise.proxmox.com) and the ceph enterprise one. From now on you can download system updates. Go back to “Updates”, click “Refresh” and wait for the task to finish.
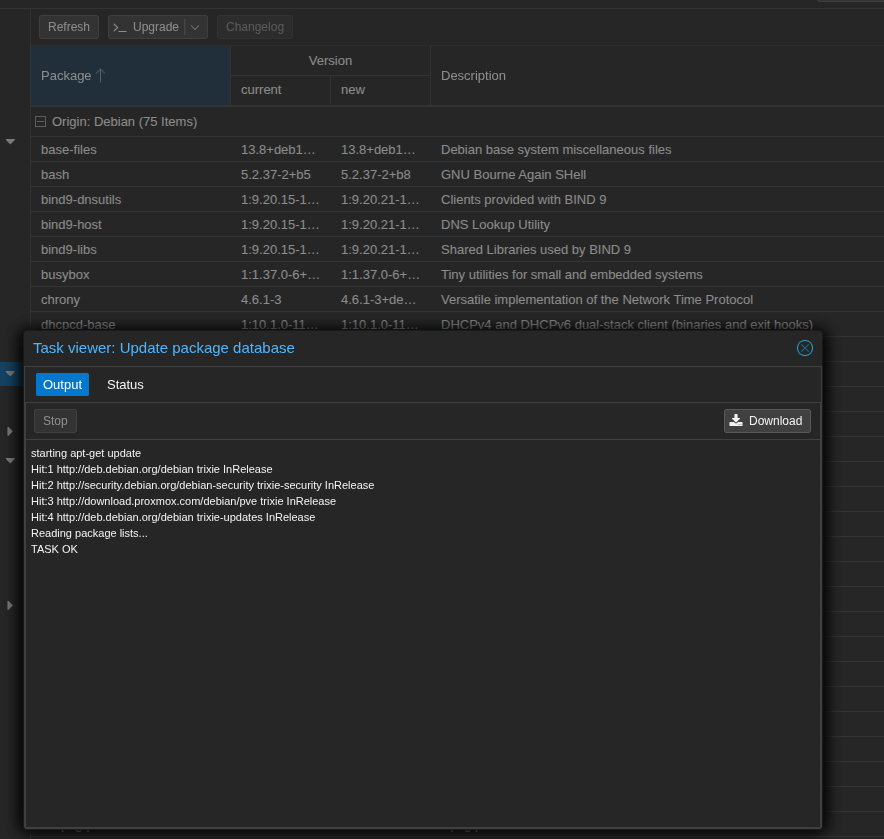
Close the window and click “Upgrade”. A terminal window will open - just press Enter to confirm the upgrade.
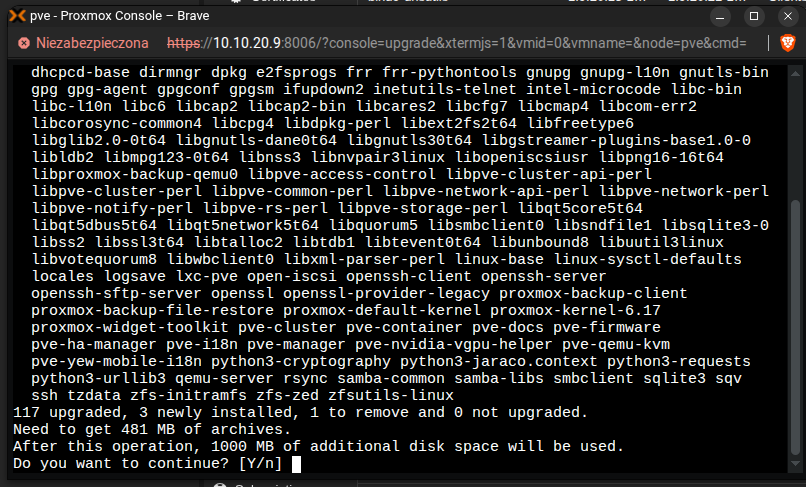
After the upgrade you may need to reboot the host. You’ll see a message if that’s the case. You can reboot from the console with:
reboot
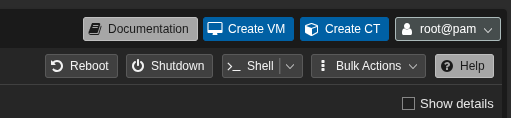
Or use the web interface - Reboot and Shutdown options are in the top right corner.
Importing ISO files
To create a virtual machine you first need an ISO of the operating system you want to install. Let’s say we want to install Debian on our first VM. Go to the Debian download page . You have two options: download the ISO to your computer and then upload it to Proxmox, or download it directly from the URL without using your local machine.
Go to the “local” storage (under Datacenter) and the “ISO Images” tab. Use the Upload button to select the ISO from your computer, or Download from URL. Paste the download link, click Query URL, and you should see the file size and MIME type.
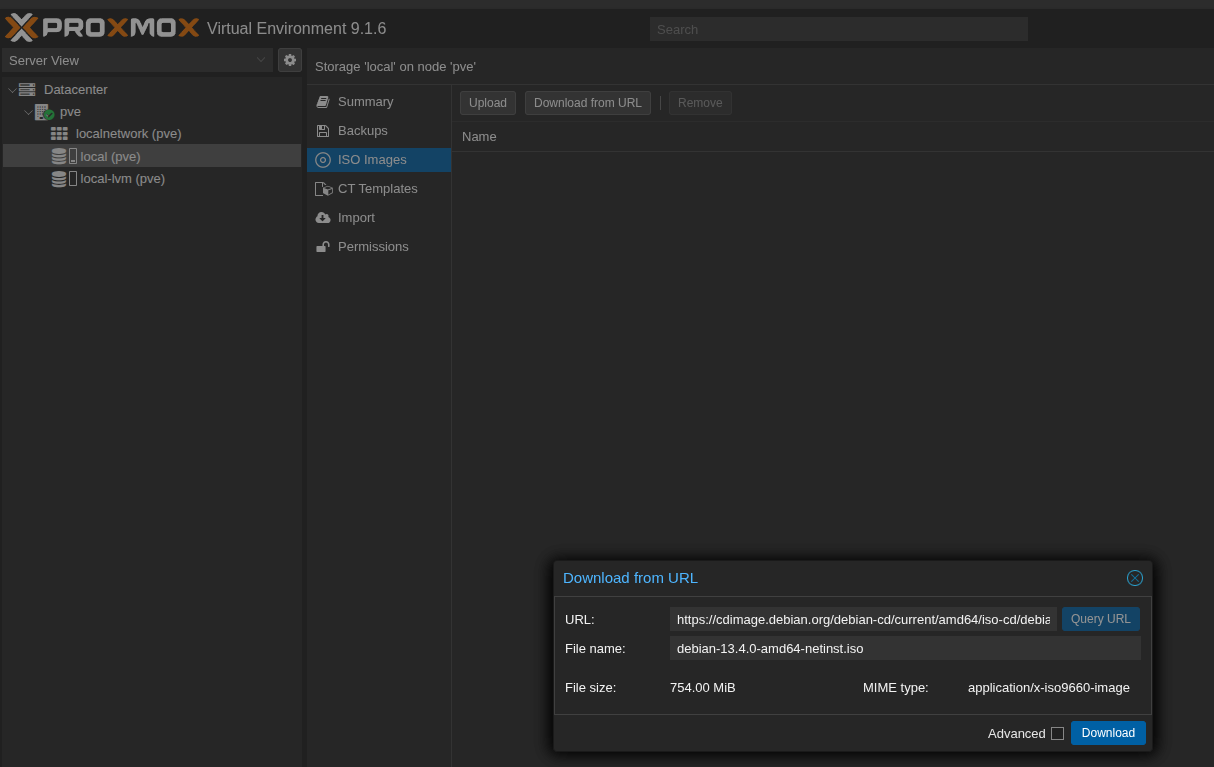
Click Download. When you see “TASK OK” at the end, you can close the window.
Creating your first virtual machine (VM)
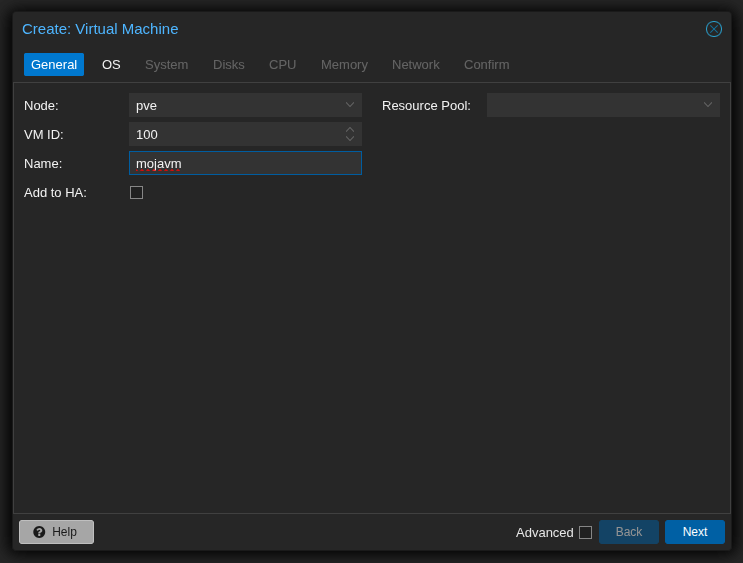
In the top bar click Create VM. The wizard will appear. First, give your machine a name. You can leave the other fields at default.
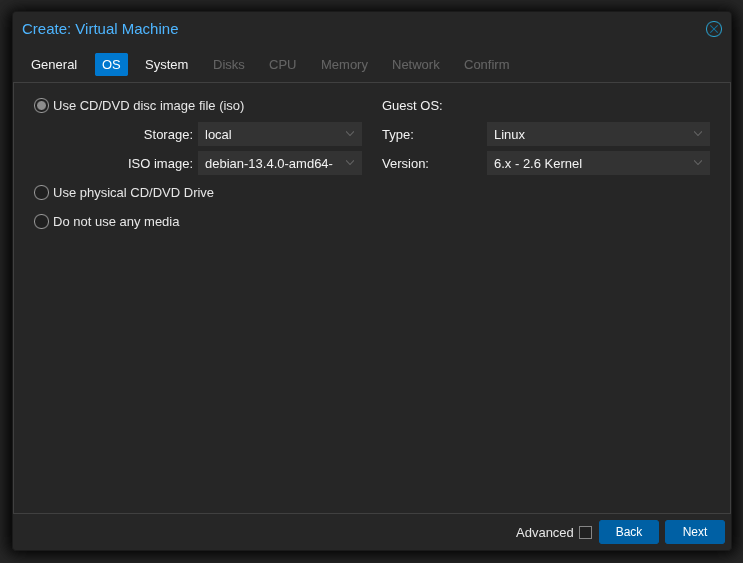
Next, select the ISO image for the installation. Choose your Debian.
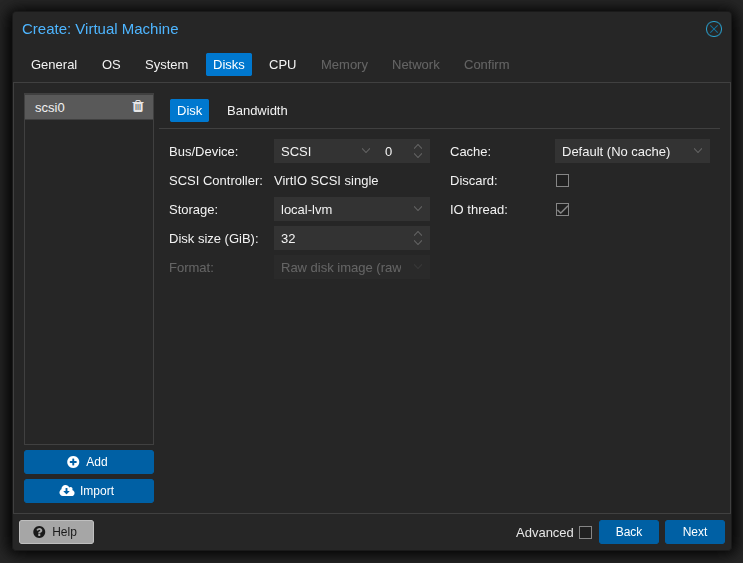
In the System tab leave everything at default and go to Disks. Here you create virtual disks. By default you’ll get a 32 GB disk. To add another, click Add and set the size. Since we have only one storage (“local-lvm”), that’s where the disk file will be created. Leave the rest at default.
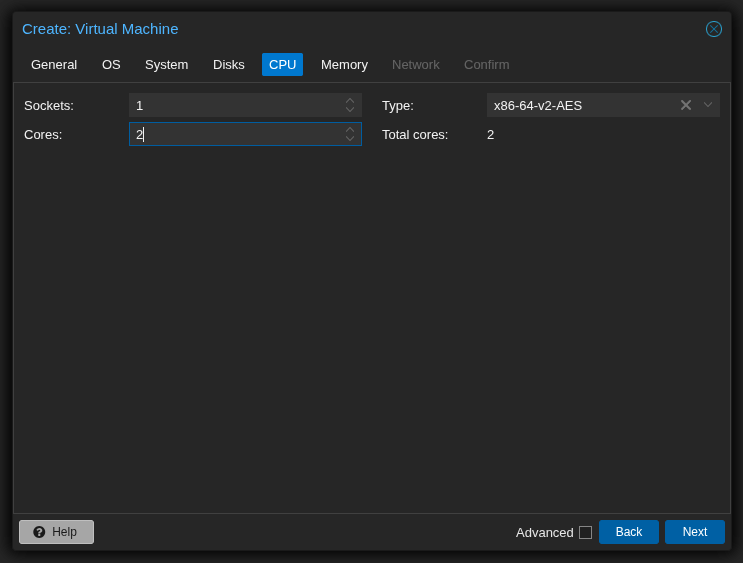
In the CPU tab you can set the number of sockets, cores, and CPU type. To keep it simple, just change the number of cores — for example to 2.
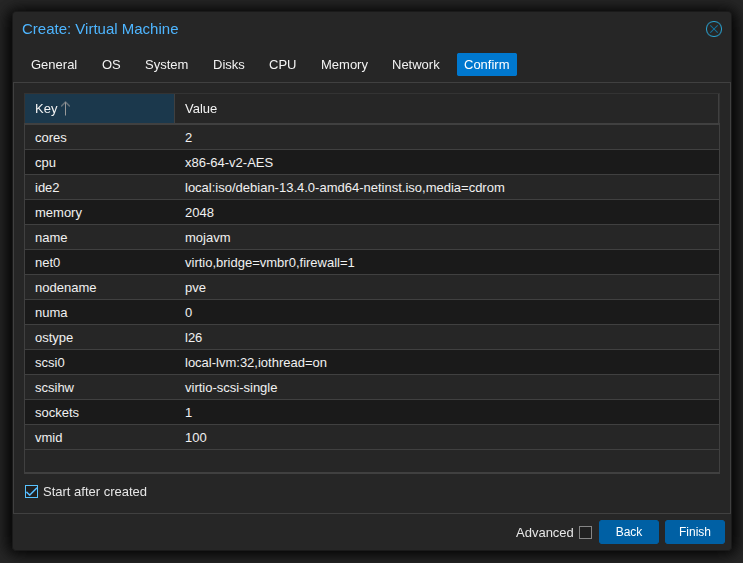
Next, set the amount of RAM. I’ll use 2048 MB (2 GB). Then configure networking - for a basic home setup you can leave everything at default. The last screen is a summary. You can check Start after created so the VM launches immediately.
Managing the virtual machine
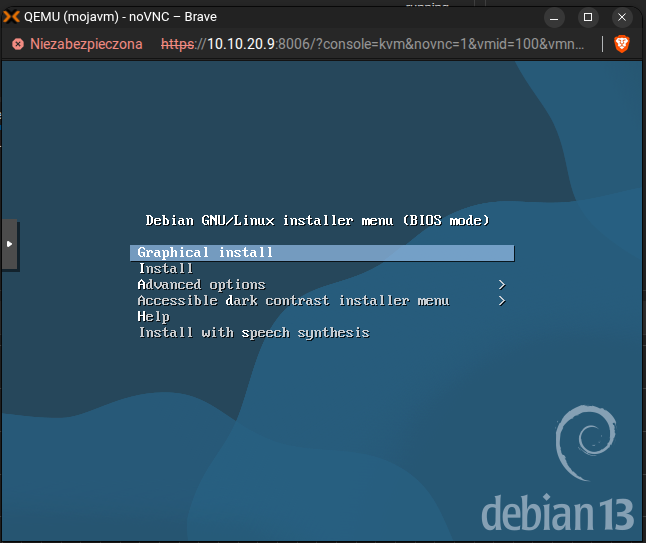
Your first VM is now running. You’ll see its name with a green icon on the left. How do you access it? Use the VNC console - it’s like a virtual monitor for the machine. Click on the VM, then the Console button in the top right. You’ll see the Debian installer wizard, exactly as it would look on a real computer.
How to control VM power?
Next to the Console button there’s a Shutdown button with a dropdown. The options are:
- Shutdown - normal system shutdown (if the guest supports it)
- Pause - pauses the machine (it stays in memory)
- Hibernate - similar, but the machine is powered off and doesn’t use resources
- Stop - hard power off (like pulling the plug)
- Reset - like pressing the reset button on a PC case
How to check VM status?
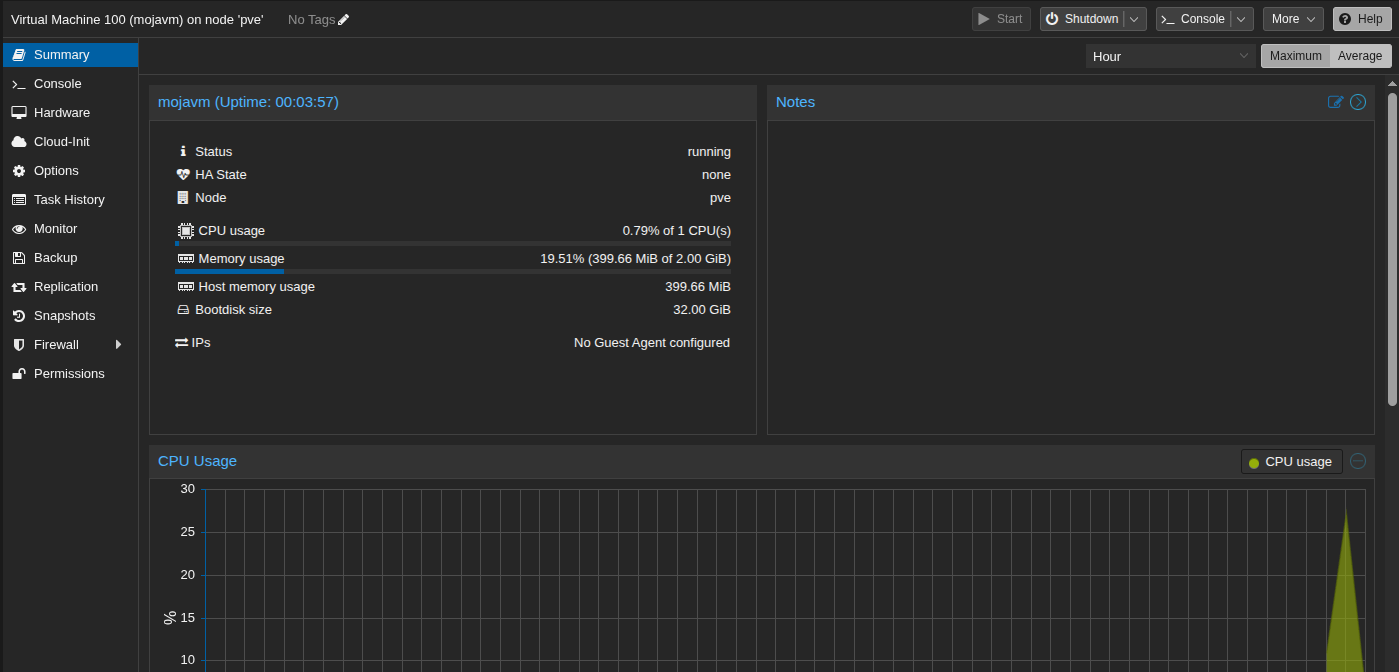
Go to the VM’s Summary tab. You’ll see CPU usage, RAM, disk usage, and more.
What is a snapshot and how do I create one?
A snapshot is a point-in-time copy of the virtual machine’s state. The machine “freezes” at a certain moment. From then on, instead of saving all data, it only records changes since the snapshot. Why use them? For example, before a big system update you take a snapshot. If something breaks, one click brings the machine back to the previous state. If everything is fine, you delete the snapshot. The guest OS barely notices it.
Important: a snapshot is not a backup. You shouldn’t keep too many of them, as they affect performance and stability over time. Backup is a separate topic.
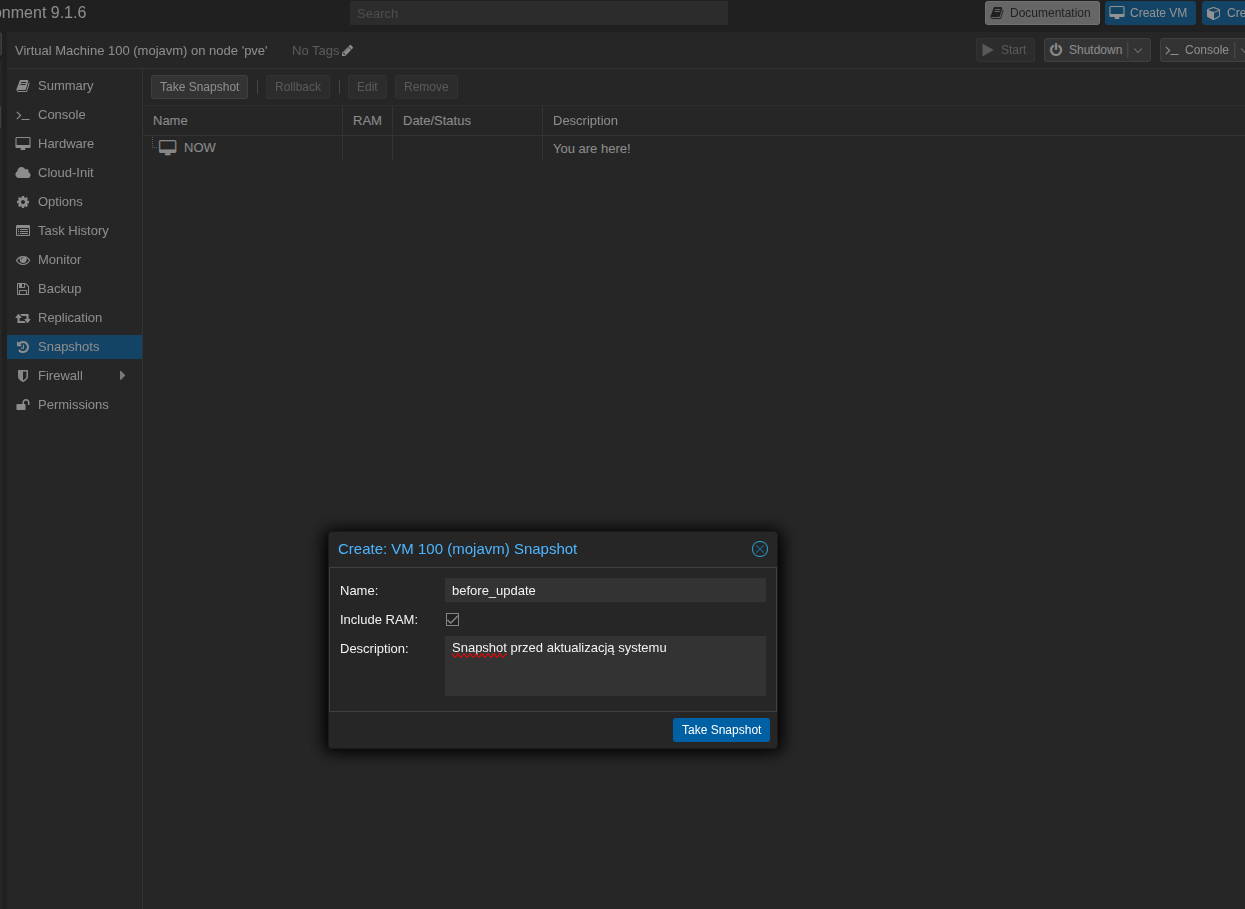
To create a snapshot, go to your VM and the Snapshots tab on the left. You’ll see a “NOW” record (current state). Click Take Snapshot, give it a name (e.g. “before_update”), and confirm.
Now you can proceed with your update. If everything goes well, delete the snapshot with Remove. If you run into problems, click Rollback. You’ll get a warning that the current state will be lost. Confirm and wait a few seconds. Your machine is back to the previous working state.
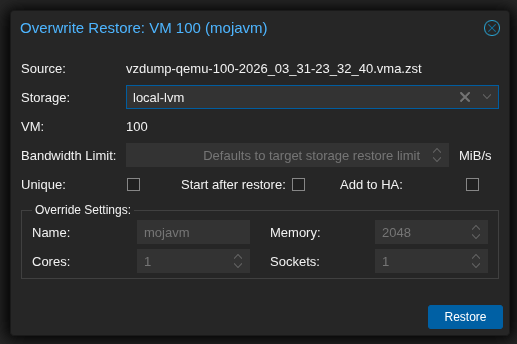
Backups are just as easy. Go to the Backup tab and click Backup now. Using default options you’ll quickly get a full backup. Unlike snapshots, you can keep as many backups as you want without affecting VM performance. Restoring is similar to rolling back a snapshot, but the machine must be powered off first.
What’s next with Proxmox?
You now know how to set up a basic Proxmox environment and run a virtual machine. That’s enough to get started, but there’s much more to learn if you want to go further.
- Backup - the built-in method is fine for starters, but in larger setups it’s worth using something more advanced like the Proxmox Backup Server. There are many options — here’s an article comparing free backup solutions.
- Clusters - connecting multiple Proxmox hosts into one system. You can easily migrate VMs between nodes and even set up high availability so machines automatically move if one host fails.
- Containers - besides full virtual machines, you can create lightweight LXC containers.
- Advanced storage - shared storage, NFS, SMB, iSCSI, ZFS, Ceph… lots of possibilities (topic for a separate article).
- Advanced networking - firewalls, VLANs, multiple network cards, traffic separation.
As you can see, Proxmox is quite easy to set up for basic use, yet offers huge potential in many areas.
FAQ
Is Proxmox free?
Yes, it’s completely free and open-source. You can use it in a company without paying anything.Why do I get a “no subscription” message if it’s free?
Because there’s a paid support option and an enterprise repository with more thoroughly tested updates. You don’t need to buy anything — the free repositories work fine, and Proxmox has a large, helpful community on the forum and Reddit.Is it worth learning Proxmox?
Absolutely. Proxmox has been gaining popularity, largely because of VMware’s business decisions. Many smaller companies have been forced to look for alternatives, and Proxmox is often the choice. Skills in Proxmox are becoming more and more valuable in the IT job market.Is it hard to use? Since it’s Linux, will I have to type a lot of commands?
Most things (about 90%) you can do through the web GUI without touching the terminal. If you go deeper, knowing Linux and the command line will eventually become useful, but it’s not required at the beginning.
Comments